

Best Practices for Retrofitting Warehouse Lighting
Wow, that is a mouthful of a title!
Let’s break this down to explore what this means, and what the best practices are. When you’re done reading this blog post, you’ll be on your way with a clear understanding of how to go about replacing your warehouse lighting with the best fitting LEDs.
Step One – Understanding Your Warehouse Environment
This is not a one size fits all approach and anyone who tries to sell you a one size fits all LED, is doing you a disservice. It is important for any salesperson to understand the context of your environment first, to help you choose the best LED replacements.
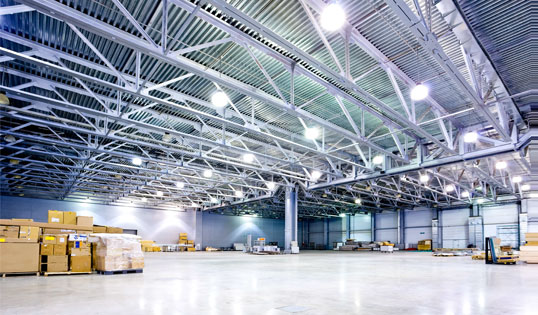
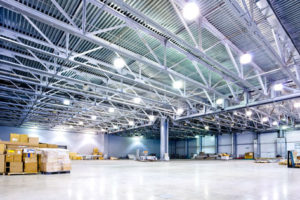
What goes on in your warehouse? Is it solely used for storing inventory or do you have employees working on detail oriented tasks? If it is being used as a storage space, then you want to make sure you have appropriate light for pulling inventory. Too often, aisles and corners are left dim and dark, and this can create an unsafe environment for your employees. In this type of environment, the goal of your lighting is to illuminate the warehouse well enough for your employees to navigate around, see properly and complete their tasks of putting away or pulling the inventory from shelves.
On the other hand, if your warehouse is used as an actual work space, where you have employees assembling parts, working on products, or doing any kind of detail oriented work, then you need to make sure that your lighting choices reflect the context of this work, pun intended. When you are working on products in close detail, you want your employees to have ample light to do their job well. Fluorescent lighting often flickers and has been known to even cause seizures. High Intensity Discharge bulbs, like metal halides, high pressure sodium and mercury vapor lights often have a warm up period or are so orange you may feel like you are working in a dungeon.
LEDs can offer significant benefits in creating a bright environment, suitable for both illuminating large spaces on a more general level, and creating the necessary light to do detail oriented work. At Martek, this is always our first goal with our clients. Without the consideration of the context of the environment, you are literally living in the dark, another pun intended.
Step Two – What are you currently using?
So, once you can clearly articulate what your space is used for, you then have to explore your current lighting situation. It’s kind of like traveling with a map. If you don’t know where you are to begin with, how can find your way to your final destination?
So, when you look up, what do you see? What kind of fixtures are there? Do you have linear (usually 4’ or 8’) fixtures with fluorescent tubes in them? Do you have round High Bay fixtures? Are they open or enclosed fixtures? Understanding what kind of existing figures you have is essential, but it’s even more critical to know what kind of bulb is currently being used. How do you know? That’s a good question. Most warehouses have some extras stored away somewhere. You can start there and check out the part number on the box or on the light bulb itself. Some of these part numbers are like decoding a secret language; don’t worry, you can always send one of the experts at Martek a picture of what you have, and include any writing on the box and we can decode it for you. Once we understand your starting point, we can help you get on your way.
Step Three – What are your goals?
Now that we understand how the area is being used, what your current fixtures and bulbs are, we need to explore your lighting and LED goals. While we would like to think that everyone’s goals are to reduce energy consumption for the sake of preserving our natural resources for future generations, we know that is not always the case. At Martek, we understand that each application and users goals are unique.
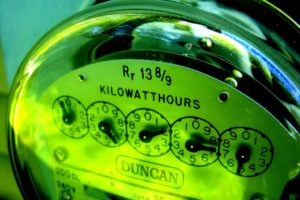
Here are some helpful hints to consider. Are your lights in hard to reach areas that require a lift to replace? Then, perhaps your goal is to find the product that will last the longest. Are your lights in your facility on for more than 12 hours a day and your electric bill is extremely costly? Then, your goal may be to find the most energy efficient LED on the market. Is your facility dim and needs to be brightened? Then, perhaps your goal would be to increase the light output. Are you looking to apply for a rebate? You will need to make sure your product meets the necessary criteria. Are your lights out and you need a LED yesterday? Then, your goal will be to find something that is in stock. These are just examples. It could be one of these, a few of these, or another goal entirely. Our mission at Martek is to understand your needs and then find you the best fitting LED that correlates to your goals. This is what best practice is all about!
Step Four – Decide What LED product is best for you.
Even with all of the above steps, there are still many options and decisions to make. The product selection will be guided by the context of your environment, what you are currently using, and what you want to achieve.
Generally speaking, you may be able to get a one to one LED replacement. This is where you literally unscrew what you currently have and screw in a LED. This is not always the best option, albeit may be the easiest. If you are currently using a bulb that requires a ballast, you need to consider whether the LED is compatible with that ballast; if it’s not, you need to bypass the ballast. Best practice tip: make sure you use a trained electrician!
Often times, especially when you are replacing a high wattage bulb, a one to one direct replacement is not the best fit. You need to consider the directionality of the fixture, since LEDs do not disperse the light the same way traditional bulbs do. I can’t stress this point enough. Yes, it gets complicated. Need help? Stop reading and call Martek!
Another option may be to keep your fixture and use a retrofit kit. This is different from the one to one replacement because you will likely be bypassing a ballast, and you may not be using the screw base that exists. This is more like keeping the shell of the fixture and replacing the guts. This is beneficially because you can control the directionality of the light more, and any time you use a LED with an external driver, it will last longer.
The last option is to replace the fixture entirely. This may be the most costly option, but sometimes, it is actually the most logical choice. LED fixtures can offer a sleek new look, increased light output, proper light dispersion, and the longest life. There are a lot of LED fixtures on the market these days, so it’s always best to consult with a LED expert like the experts at Martek. We have over 40 years of experience and deep knowledge of the most modern LED fixtures available. We will make sure you are getting the best fitting LED for your specific application, and we will ensure we meet your desired goals.
Step Four – Installation
Many LEDs are readily available; others need to be special ordered. You’ll want to take this into consideration when you schedule your installation so that you can coordinate with the team who will physically install the lighting. You don’t want electricians to show up before the lighting arrives!
Be sure that you are working with a qualified electrician who has experience installing LEDs and follows good safety protocols when working. If you need assistance finding an electrician we can help you find someone in your area.
Once your LEDs are installed, you can begin to reap the many benefits that LEDs offer. From cost savings on energy, maintenance free lighting, brighter illumination, no warm up time, cooler operating temperature, and preserving our natural resources, it’s a win-win situation.
Call Martek at 856-427-9411 today, and let us help you through these steps and ensure you are getting exactly what you need!
Posts
Popular

Tell Us a Little About Your Lighting Needs: